|
As many of you should remember, I got my brand new shaker-style kitchen cabinets on Craig's List this summer for a whopping $1200. For those of you who have never bought kitchen cabinets, you may be thinking, WHOA THAT'S A LOT. On the contrary my friends - cabinets are usually the reason why kitchen renovations can sometimes reach over $30-40K. Mine are all wood and soft close! WIN! The cabinets are also a really nice looking wood, so I've been going back and forth about whether or not I should paint them. When I unboxed them again today (they've been sitting in my garage since July), I got really excited and again couldn't decide. Ultimately, though, I know I want a nice bright and open kitchen, so white is the way to go. I can't wait to start painting them! 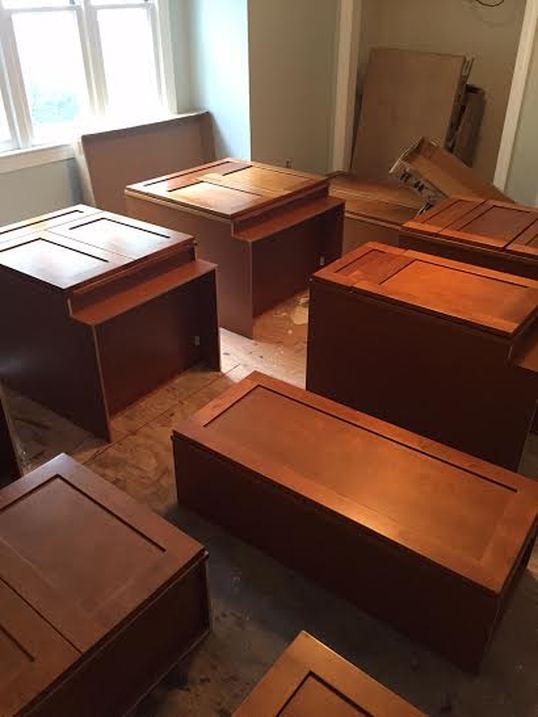 The first thing Brian and I did was bring them in from the garage and lay them in the downstairs bedroom. We needed to label each box and then each drawer and door. This ensures that when we go to put the doors and drawers back on, we know exactly which box they belong to. 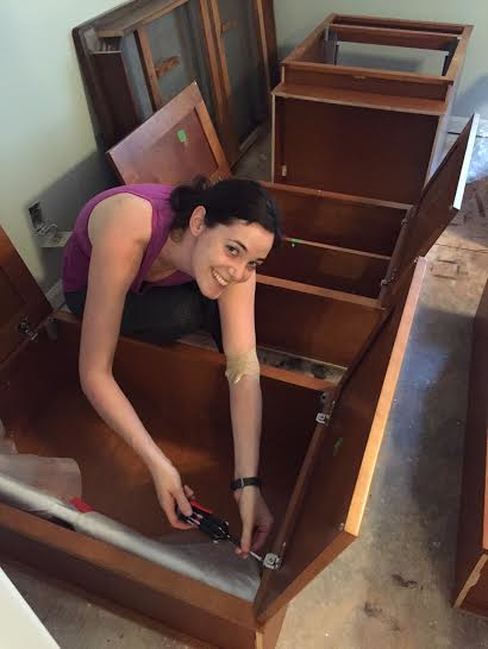 Don't mind the bandage, Brian and I had donated blood earlier today! Now, removing the drawers and doors was a very, very simple process. The drawers just clicked out of place, and then the doors just needed two screws each to be taken out. We took all of the drawers and doors upstairs to the other guest bedroom and the boxes stayed in the downstairs bedroom. 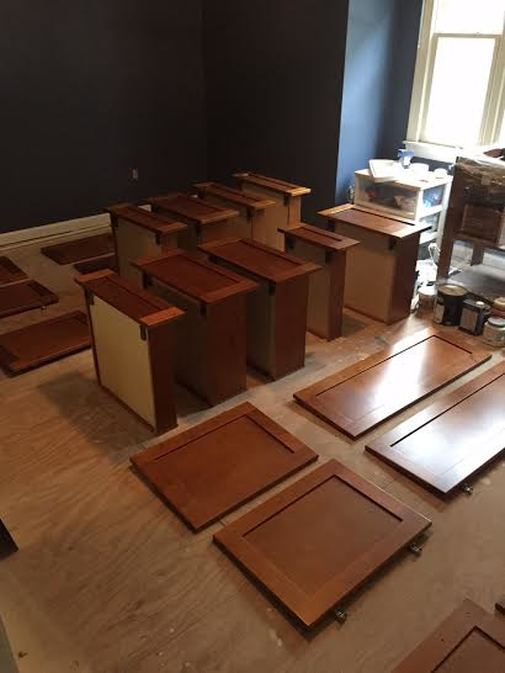 The next step will be to stand them all down, prime, and then paint! I can't wait! 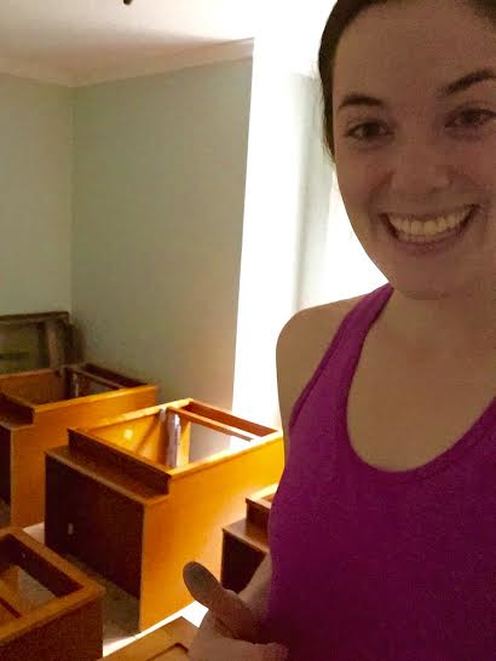
1 Comment
Oh Boy!! Two posts in ONE DAY! I guess I have to make up for the lack of posting over the past two months somehow... Well, just as the title implies, the kitchen ceiling is back up again! This is a huge milestone in the renovation process, mostly because it means that soon enough we will be able to install the kitchen cabinets, which means we'll be able to install the flooring, which means I'll be able to move in! Yippie! The biggest holdup in the ceiling installation was the replumbing of the master bath. Now that the shower pan has been installed and Tim-the-handyman has moved the plumbing for the toilet, shower, and two vanities, AND we checked for leaks - the ceiling down below could officially be installed. Hallelujah. Brian and I started off Saturday by prepping the walls and taking back some of the ceiling drywall that had come loose when we removed the kitchen wall (oh so long ago). While Brian was doing that, I went ahead and installed the insulation back up between the trusses. I'm hoping I got the right kind (R-13), but it wasn't the same color as the stuff I'm used to seeing (the yellow kind or the pink kind). I'm hoping the brown color just means it's "recycled" insulation. Come Sunday, we were ready to roll with the installation of the drywall. Terry came back to help us out a bit (definitely a 3-person job), and I am so grateful that he did. The space ended up only needing 3 full sheets of drywall, and then it will need just a little extra in the back. 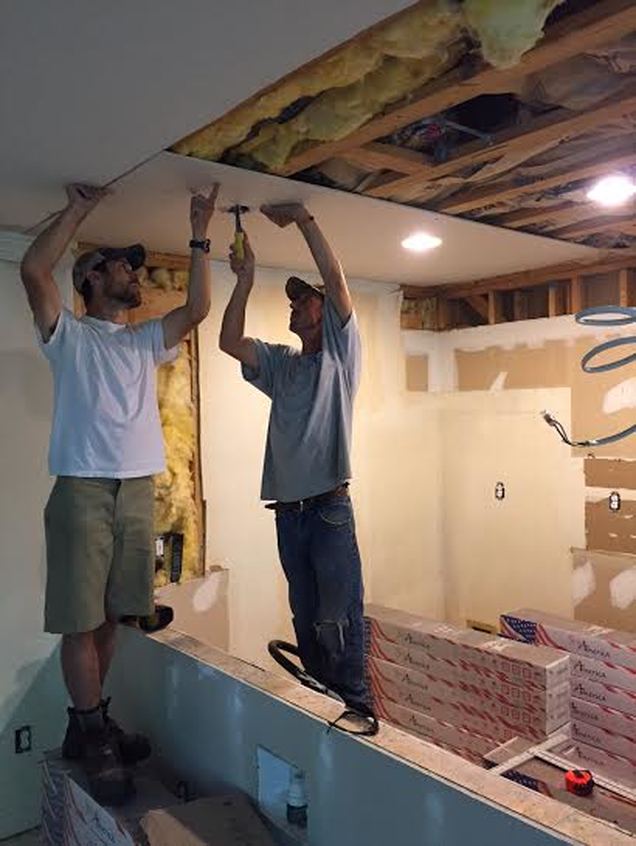 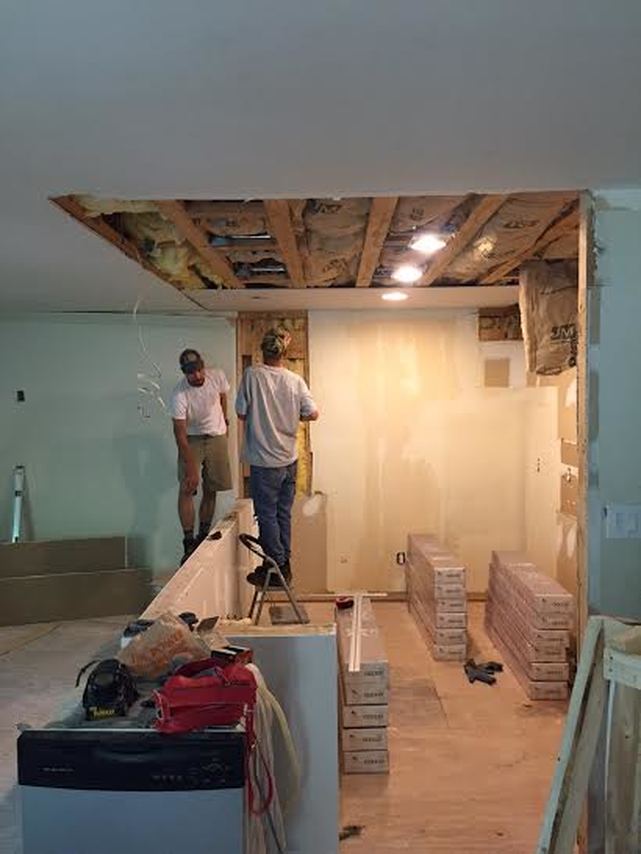 Notice that we are putting the flooring to good use as step-stools! Brian would murder me if I left this post without giving credit to his awesome idea (that Terry and I both thought wouldn't work. It did.). My kitchen is going to have six lights, three of which are pot lights, and three of which are pendent. All of these lights require cuts to be made in the drywall, which means a lot of perfect measuring that must go on. Since we know how well the measuring has gone in this renovation process, Brian had the idea of using - wait for it - lipstick. Yes, my friends, we traveled to our nearest CVS to purchase the cheapest stick of Wet-N-Wild bright pink lipstick for this project - and I have to say it was a genius idea. Nice work, Brian! 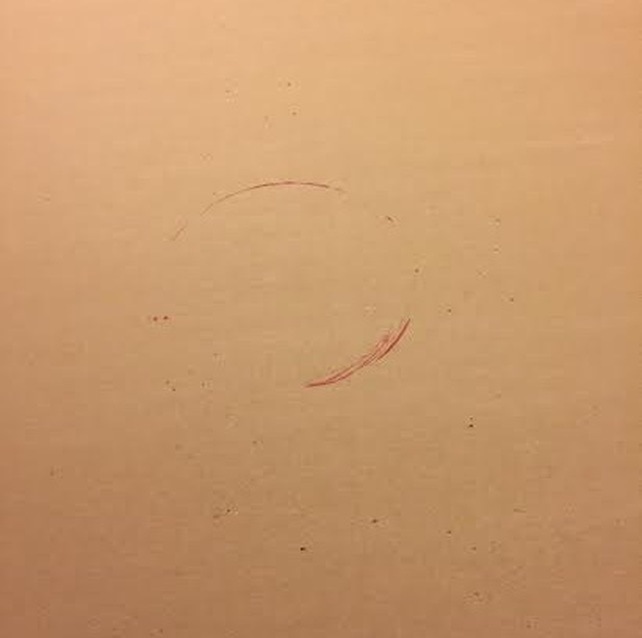 Notice the circular pink imprint on the drywall. By holding the drywall up against the ceiling where it needed to go, and then pressing the drywall into the light fixture, the lipstick left an imprint exactly where the light was, meaning we knew exactly where to cut the drywall (with no measuring whatsoever). Brilliant. 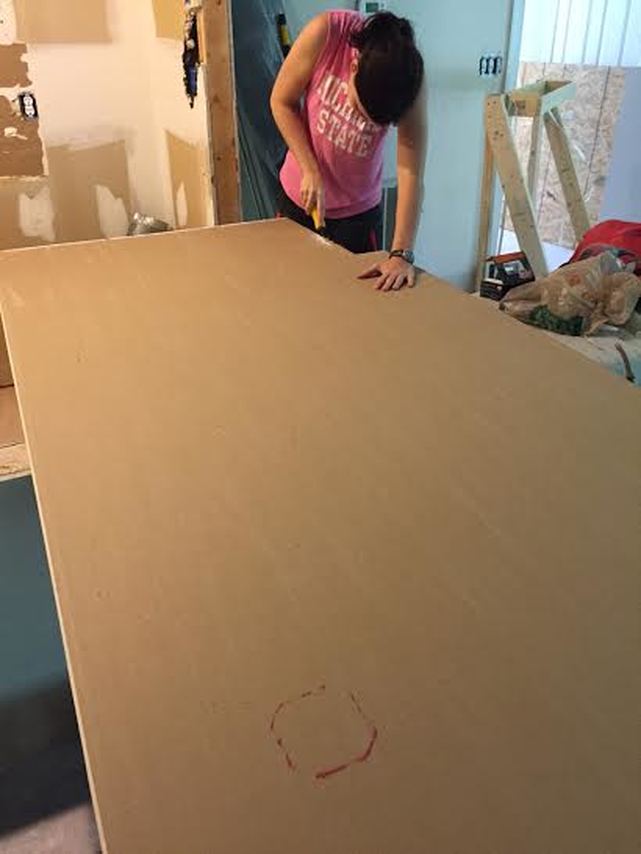 Notice more lipstick! I even put the camera down and helped cut a little bit. 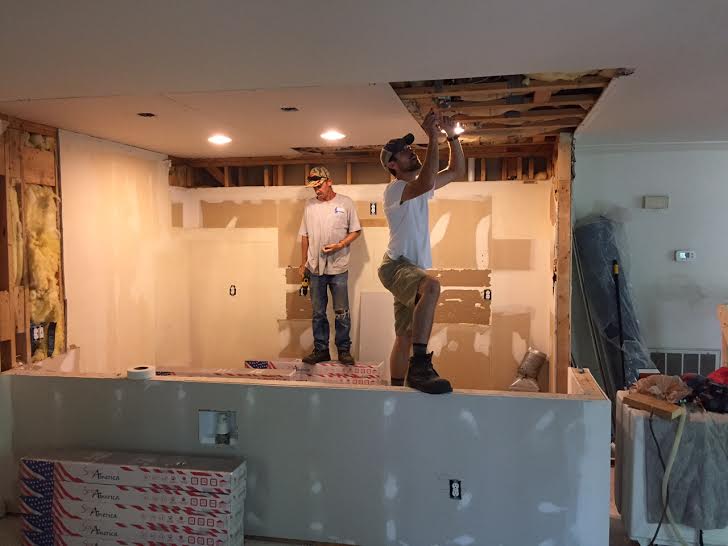 I want to say the entire process took about 2.5 hours, but then we started to mud and fixed up some other areas that also needed some drywall. Overall, I am pretty satisfied with our Sunday project! 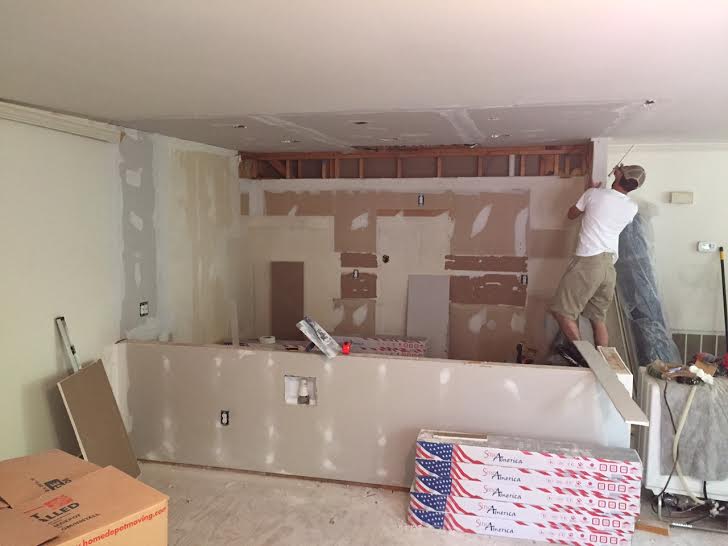 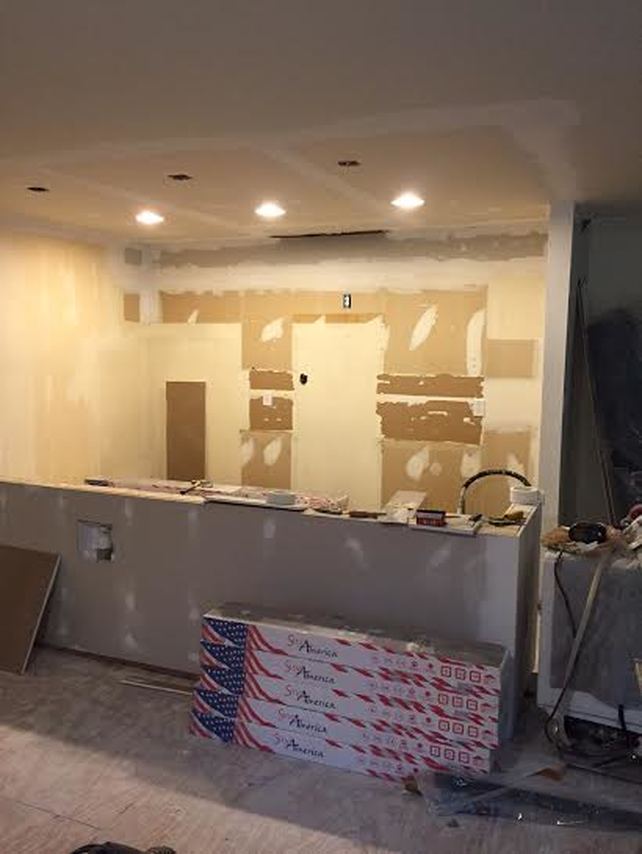 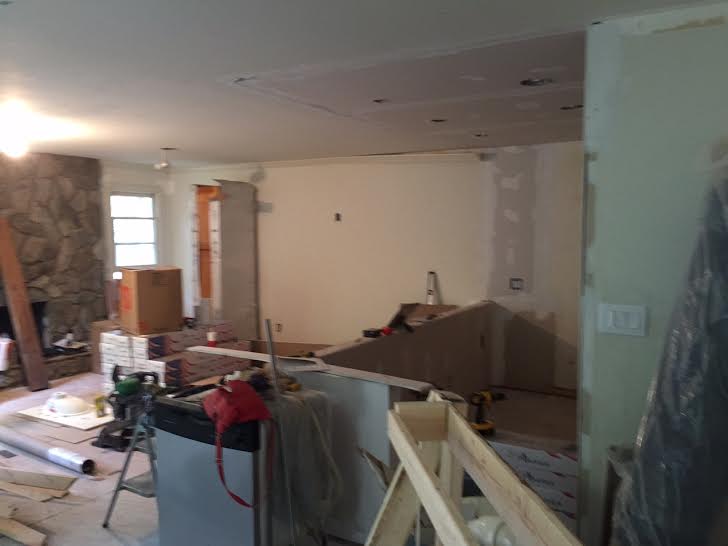 Just like everything else in this house, the design for the Master Bathroom has gone through some changes - basically everyday. I have ordered and reordered shower pans. I have laid out and then redesigned the layout about six times. Through it all, I have finally decided to stick with my final plan, which includes a double vanity with makeup station, a relocation of the toilet (next to the shower), and a 32" X 48" shower. See blurry picture below: 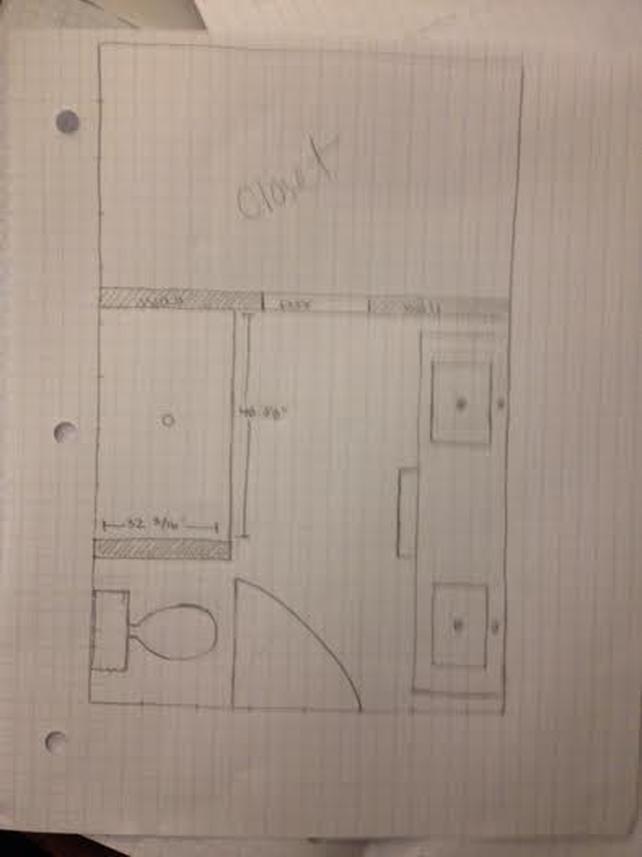 To his credit, my dad really helped me design the bathroom (thanks dad!). The biggest hiccup, though, with this design is the amazing neverthoughtidbesolucky double vanity. One word: Expensive. Now, most people know I am a pretty frugal person, so when I started researching double vanities, I was blown away at home much they cost! Anywhere from $1500 to upwards of $3000 - for basically cabinets and a countertop! Yikes! It took me all of about five minutes to realize that I was going to have to build this one on my own. I actually feel like this is the better way of doing this particular vanity anyways, given the odd size of the space (87.5"). After Pinteresting and Googling and searching odd blogs, I found a vanity look that I really like. I even found some plans on Ana White's amazing building blog, as well as many inspirational pieces that helped me design my particular vanity. The picture below really set me on my journey that I could, in fact, do this. Remember - I am not a carpenter, nor have I really even built anything before (unless Ikea counts). 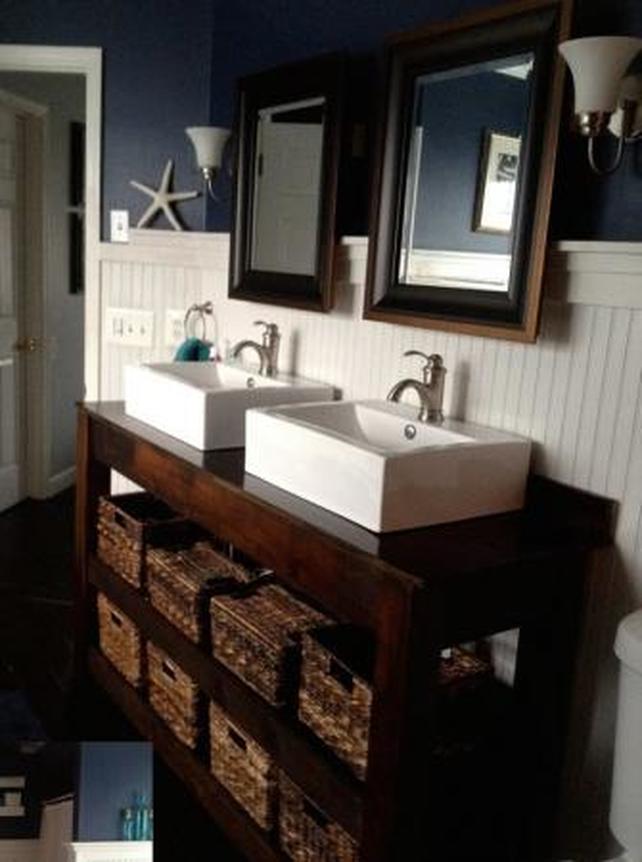 I've honestly never been a huge fan of vessel sinks, mostly because I think they just get in the way and can collect dirt and dust around the edges of the sink, however I do love their look here, Bonus - the only holes I would have to drill for the sink are for the plumbing. So, after finding my inspiration, I started drawing. 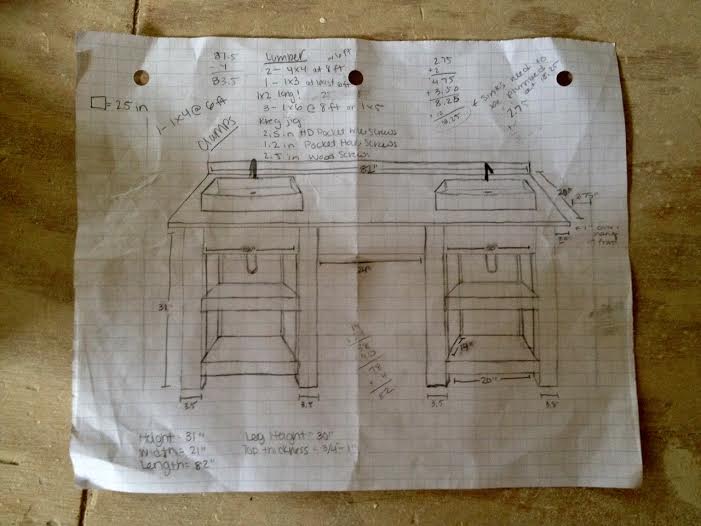 I do like the simplicity of one table, as with my inspiration picture, however after sending multiple plans to my family (and talking to my dad about resale), they all said to go with this one. Double vanities in general get potential homebuyers excited, but throw in a makeup station and they'll get even more giddy. I designed my vanity to be roughly 31" tall, however in reality it will be about 30.75". I know my mom is having a heart attack right now about the height (we are a very tall family), however to create a makeup station (i.e. a table that you sit at), the vanity had to be slightly shorter that the average tall person would prefer. To make up for the lacking inches (see what I did there...????), the vessel sinks I have researched range anywhere from 5-6" tall. This should make the total height roughly 36". So, after searching the "brag posts" on Ana White's website for the DIY Farmhouse Vanity, I stumbled upon Anthony's version of the plans, posted on Wholesteading's blog. I can honestly say that without these detailed plans, I'm not sure if the build would have gone as well as it did! Anthony's vanity is below: 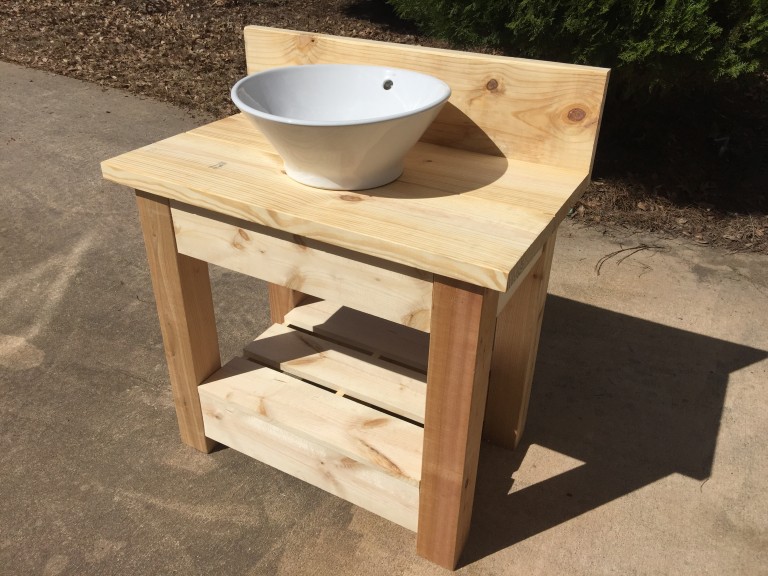 I took Anthony's idea of a single vanity, resized it to fit my needs, and then created two. I started by going to Lowe's and searching for my lumber. Unfortunately, I had the same issue arise as Anthony, in that Lowe's did not carry 4X4 pine posts, only cedar. (Needless to say, my house was smelling great.) I had also intended to go to Lowe's and buy everything except for the countertop, something I assumed I would deal with later, however, on clearance for $33, I found a 20" X 8' piece of spruce, almost exactly the size countertop I would need! Yippie! 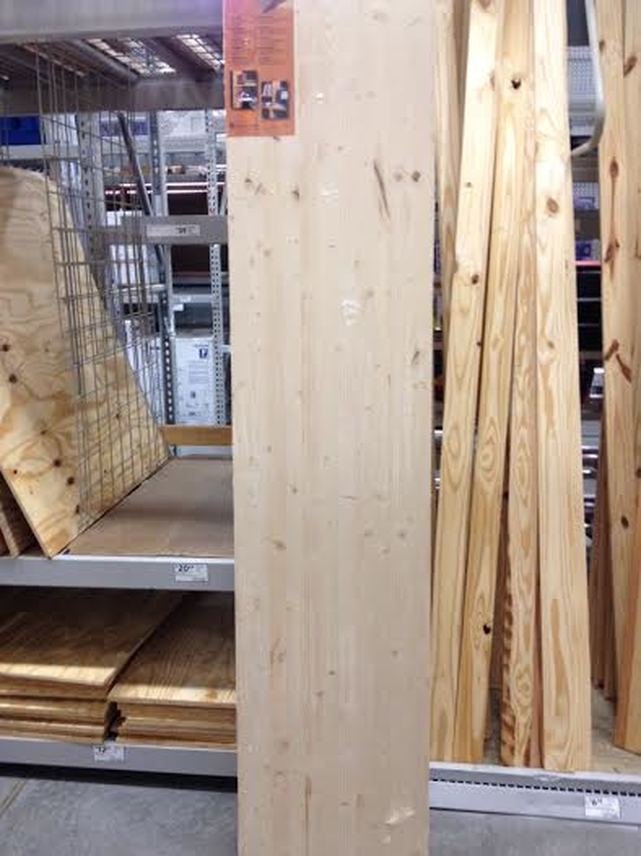 In total, with my Lowe's 10% off moving coupon, purchase of my new Kreg Jig (complete with a free box of 500 count 1.25" pocket hole screws), and all the lumber I could possibly need, my grand total came out to just about $300. Much nicer than that original $1500 vanity! I started building around 4:00 pm and didn't finish for the night until around 10. Brian ventured over after work and helped a bit, too! I started back up again the next day and finished the project. The project, not including staining or polyurethane, took about 2 days, but if I had started earlier in the day on Saturday, I definitely could have completed both vanities in one day. 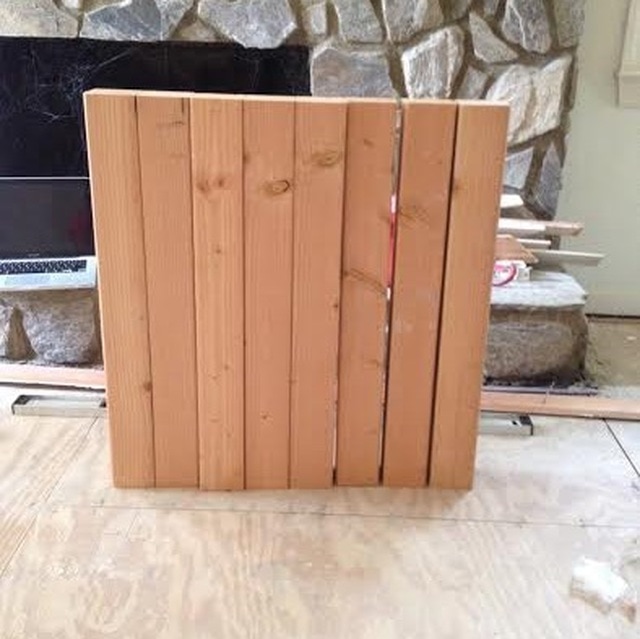 Cut the eight cedar posts to 30" Make sure to look at each post and determine which side you want facing the front. There are definitely good sides and bad sides to each piece of lumber, so be very careful to choose the best side! I even labeled each post on the bottom as "Right Front V1" (for Vanity 1) or "Left Back V2" (for vanity two). 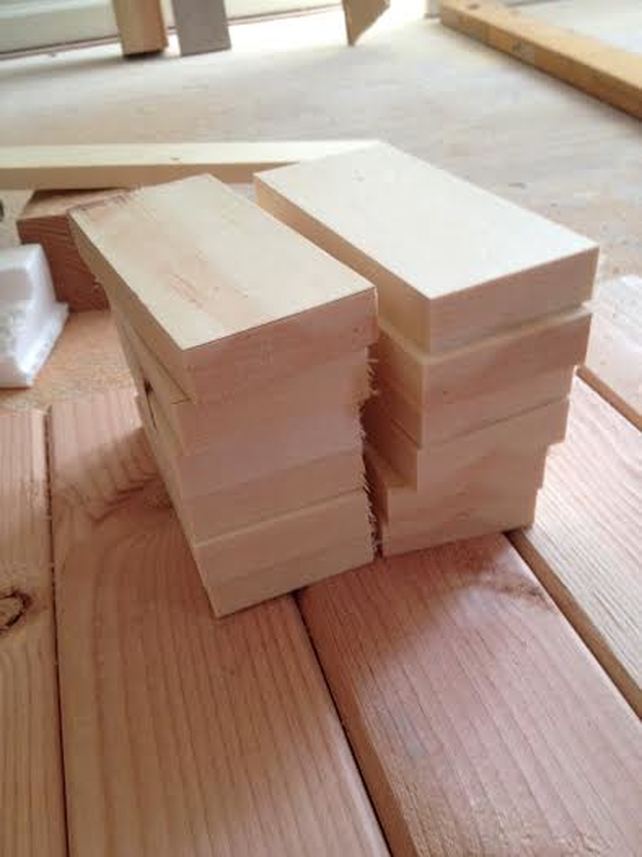 1X3s cut to 5.5" 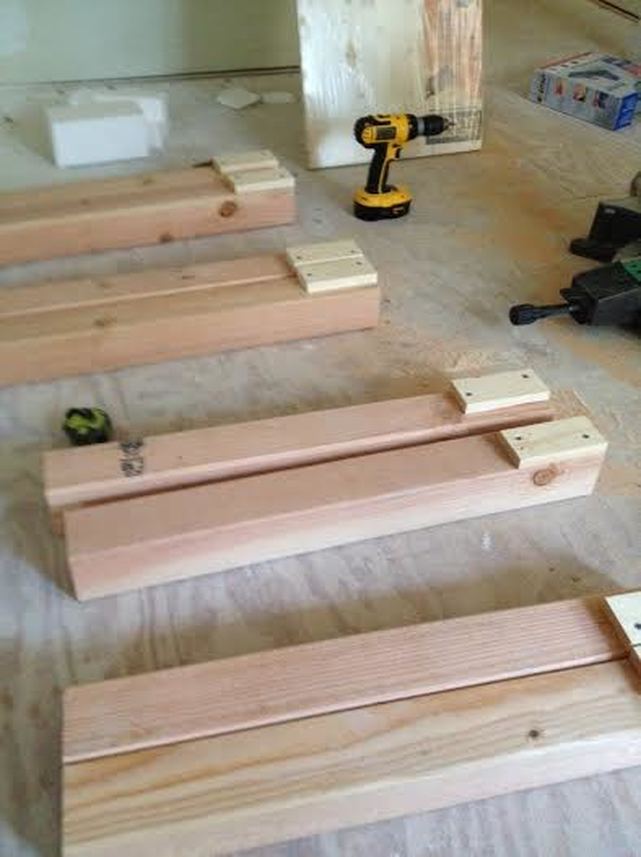 1X3s attached to cedar posts I made sure to pair my Right V1s, Left V1s, Right V2s, and Left V2s together so I attached the blocking at the correct spot! 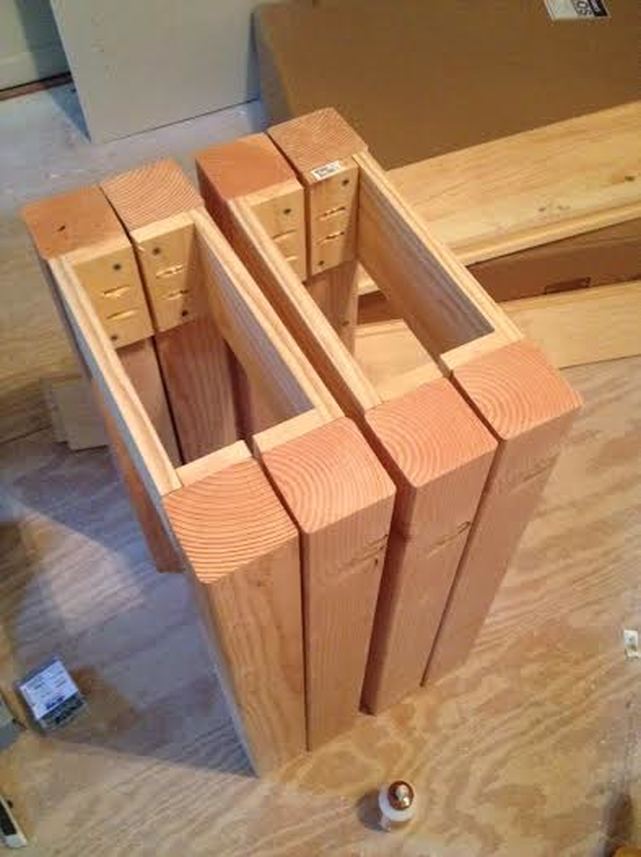 Attached the 12" 1X6 boards 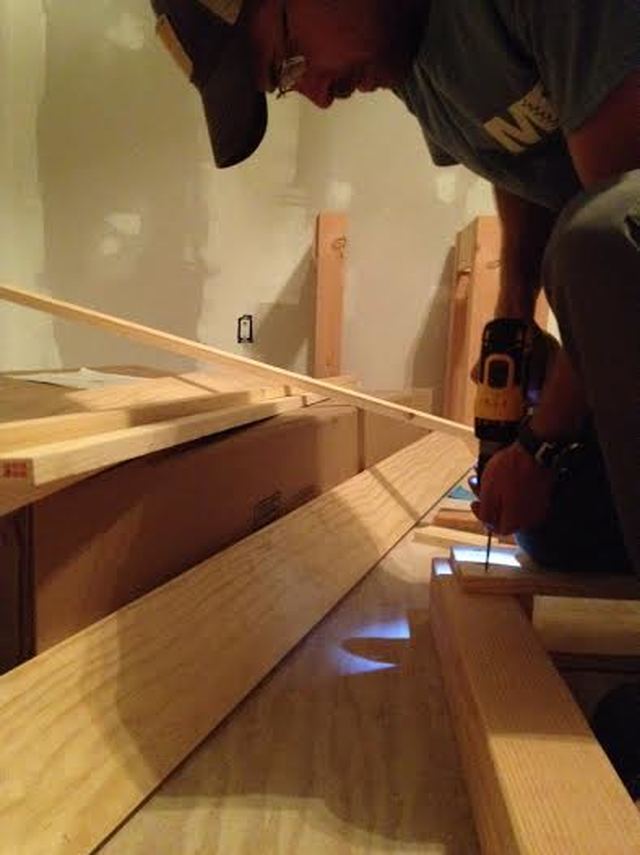 Brian helping me attach the inside supports 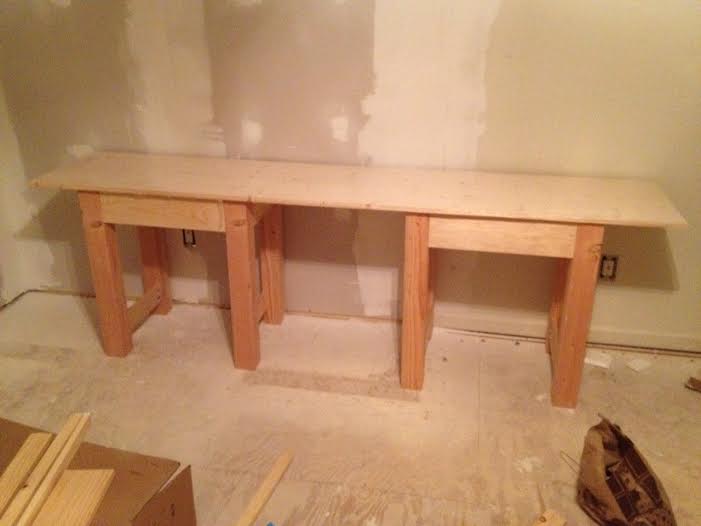 Day 1 complete! The vanity looks more like a workbench at this point, but it's getting there! (Remember, the top will not be attached until the vanities are installed - probably sometime in 2018). The start of Day 2 began with me adding braces to the outside of each vanity, were I will attach another 1X6 across the top of the makeup station (for unity of the piece and to attach the two vanities to each other). 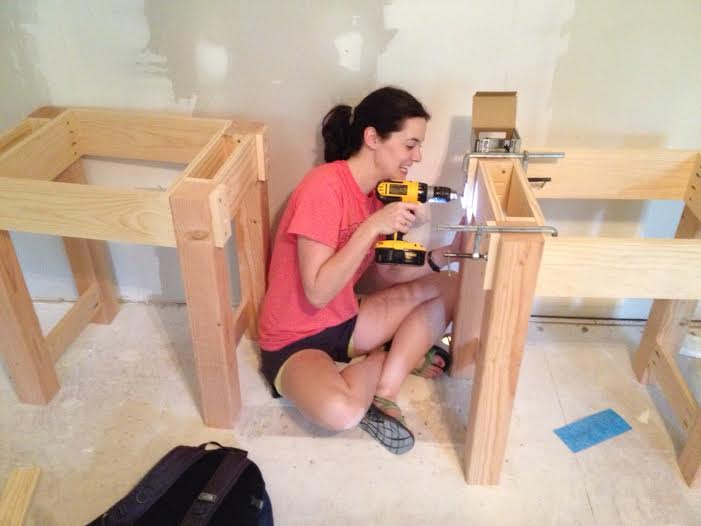 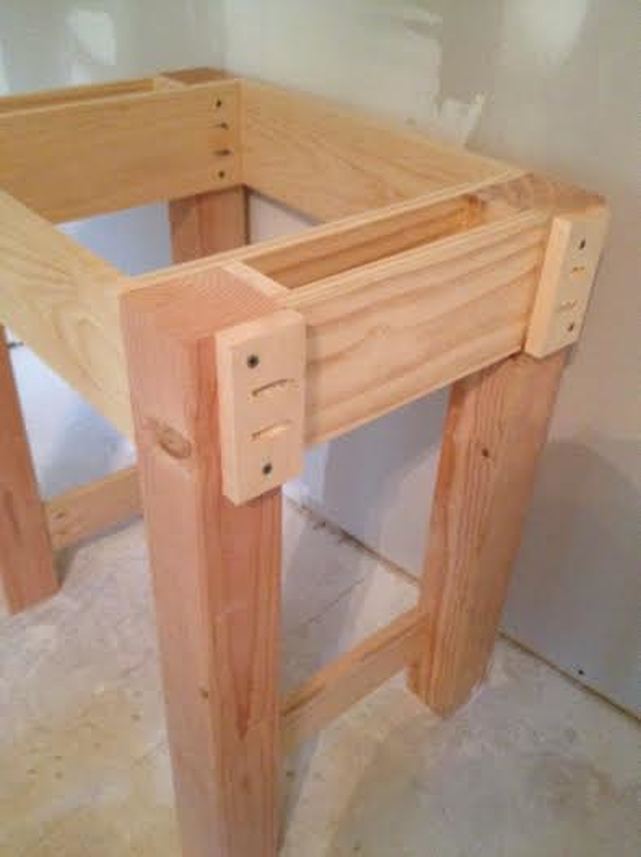 I then attached 1X4s to frame the lower shelf, and then attached 1X3s to the inside of those with a nail gun. The 1X3s will act as mini shelves for the 1X2 slats to sit on. 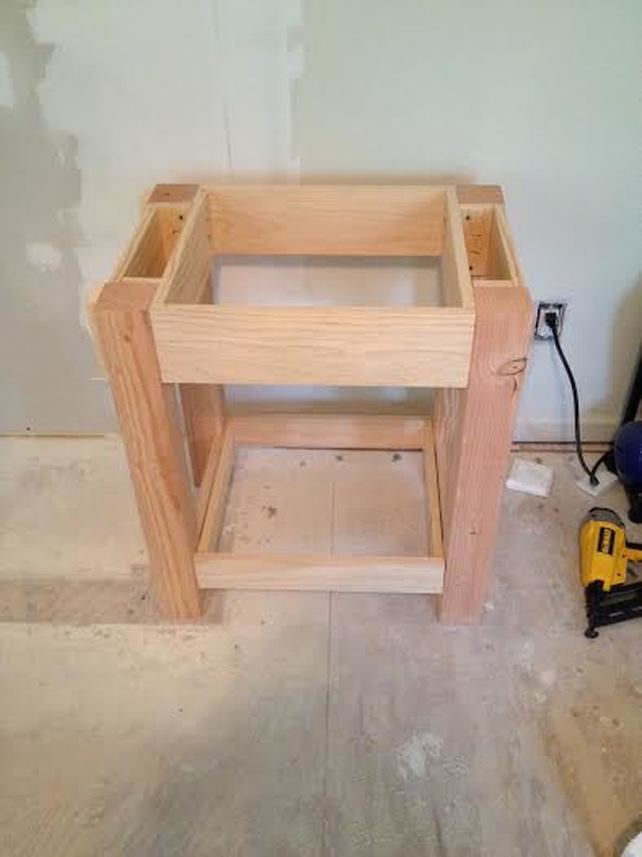 Finally, I added lots of pocket holes to the top 1X6 so I have something to attach the countertop to. That was really the last piece of "building" I had to do (at least for now). Next, it was on to staining! Brian picked out the stain - Minwax English Chestnut. So beautiful! 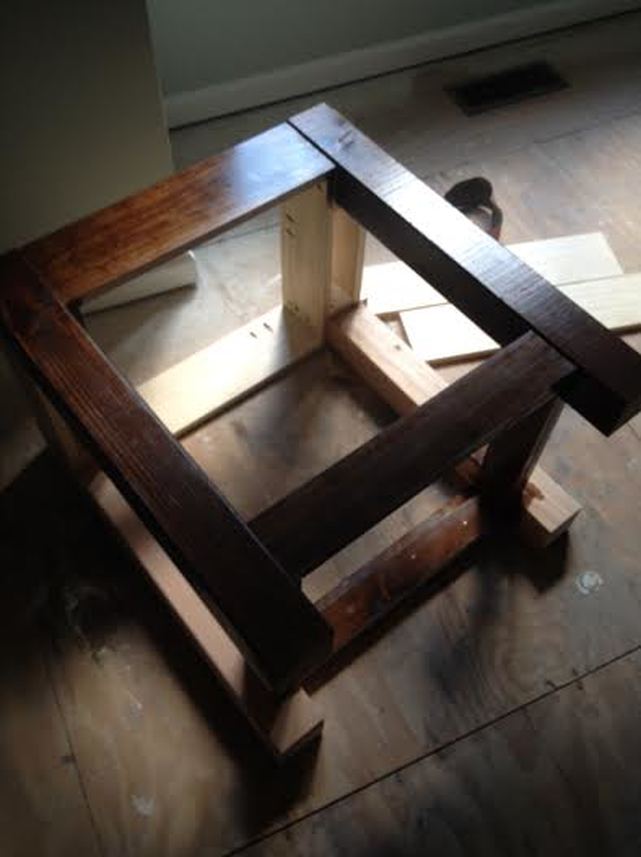 I stained the 1X2 slats while they were still one long 6' piece. I read in the comments section on Ana White's blog that it would go much faster this way - and I agree. I did not, however, apply the top coat while it was still one piece.... I was just too excited to see what the bottom shelf looked like and I had to cut it into little pieces! At this point, I still needed to buy one more 6' piece of 1X2s. Each vanity uses 2 - 6' pieces, but I originally only bought 3 instead of 4. Whoops! 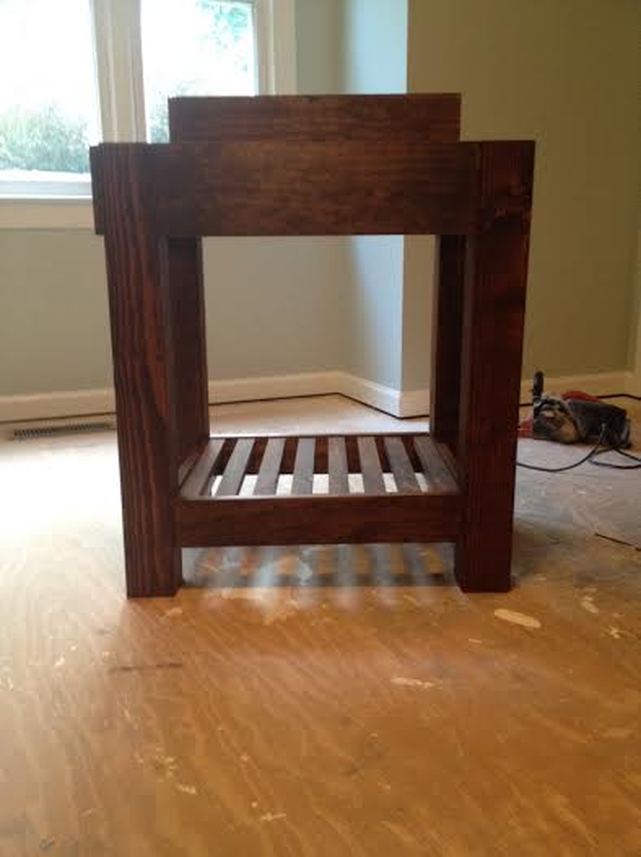  The vanities aren't actually attached (the middle 1X6 is just lodged in between them), and obviously the top isn't stained yet.... and the second vanity is still missing its bottom shelf, but I'm almost there!  Where the measuring tape stops is exactly 82", or the actual length of my countertop! I've now taken the top back to Lowe's and had them cut it to size. From there, I stained the top..... but it did NOT come out how I expected it to. It. Was. Terrible. The top originally turned out very red. This is not how I imagined my "rustic-y" vanity. The picture below really doesn't do it justice.  Since you can layer stain, I went ahead and added a second coat, which turned out dark red-brown. YUCK.  Thank the lord I did not stain the underside, because my tabletop was looking like a disaster. I decided to flip it over and try again, and I am so happy I did. The end result is below. 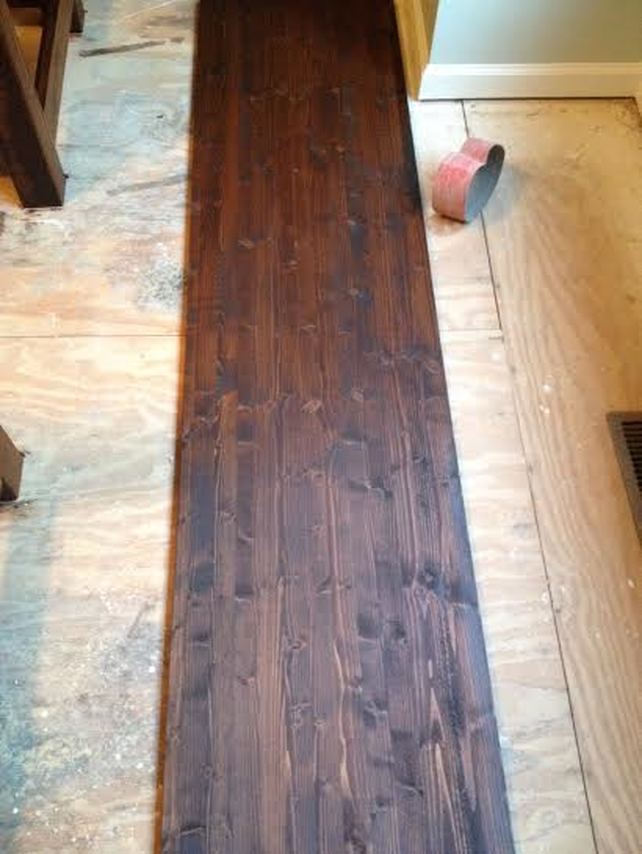 Much better! Now, I need to polyurethane the entire vanity, buy some vessel sinks, and maybe install a floor in the master and I'll be ready to actually use these things! Whew! 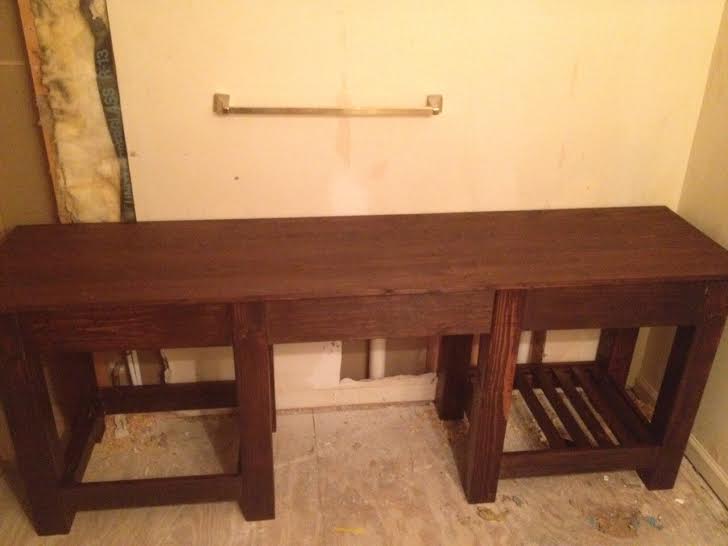 Almost there! Just need some drywall, sinks, and floor! |

about meHi! I'm Lauren! I'm a twenty-something teacher and homeowner in North Carolina. I love math, decorating, and getting down and dirty learning new things about home renovation and repair. Categories
All
Archives
December 2018
|
 RSS Feed
